Well we didn't expect that! Wow so many entries for the challenging challenge and you're all having so much fun with it! Thank You for playing along with it and I hope you had a lot of fun, lots of hair tearing but you overcame and mastered, well done!
We'll be back later in the week with our Top 5 and winner of the
Donna's Den prize, thanks again for sponsoring us Donna!
Also a Thank You to
Itzuvit for being our special guest designer!
***************************
CHALLENGE 19 - DESERT ISLAND
This is another thinking challenge! Imagine if you were on a Desert Island for at least 6 months, what crafty essentials would you *need* to have with you? What would you never tire of or get bored with if these were the only things you had?
You need to make your ENTIRE creation using only the items you have on your island, items you really couldn't do without.
You can be quite broad with this such as "Magnolia Stamps" or "Sticky Gems" you don't have to limit yourself to a particular one.
The thought behind the challenge is to see what items really are favourites, long lasting and a good investment. Newer cardmakers (and those more experienced!) are faced with an enormous amount of craft items but where do you start? How many items have we bought but never used or wished we'd bought that other item instead? This challenge should show up some sure fire items which won't turn out white elephants.
If you're a more experienced cardmaker please also play along as your input will be very useful to newer cardmakers. I will also collate a hot list at the end of favourites to show in the sidebar.
No you CANNOT take Tim Holtz!!!!!

We're sponsored once again by
Joanna Sheen with a £10 gift voucher. New items at Joanna's are
Michelle Marsden range of rubber stamps which are a wide range including vintage, oriental, flowers, flourishes and alphabets. Pop over and have a look at Joannas extensive online store with absolutely something for everybody! Thank You once again Joanna for sponsoring us!
Onto the DT and here's our favourites and we're also joined by two guest designers
Freckleface &
Janey :)
With all our future challenges if you wish to be considered for the next but one challenge please put GDT after your entry. Please post your entries in Mr Linky by Sunday 2nd May 12pm GMT. If Mr Linky is MIA post your entry in comments and we will add them when he reappears!
 K&Co papers ...lush!! - Ive distressed them a little with scissors anda nail file..do i get to take them too ;-)...ive used a magnolia image but i really had difficulty chosing... but she's nice to colour...flat back pearls...large and small roses, hat pins, charm, ribbon to make a bow with my bow maker, some reaaly nice sheer lace, leaf punch..and i used my MME bloom and grow papers for these..so im taking those too :-P Everything is covered in glimmer mist added sparkle to flowers with my opal dust also my new friend Mr Stickles in cotton candy and stardust around some of the distressed edges glossy accent and of course my faithful promarkers in the following colours ivory, blush, dusky pink, tan, sandstone, cinnamon, cocoa, henna, babypink, cocktail pink, antique pink, pastel pink, pear green, moss and vanilla.
JANEY
 Assuming NO electricity on the desert island to plug in my beloved computer& most of my suitcase is taken up with other essentials...wine, wine glass,cork screw...I've taken just a few small crafting goodies just in case I'm rescued. Always be prepared with a card!
My passions this week are Black Peel-Offs, embossing on a lightbox (ofcourse I'd use the light of the sun) & Gems.

 I have used a wee box and chucked in all that I would take with me, Distress ink pads, brads, decoupage fairys (I just adore these so so much) little gems, a flower punch, the biggest I could find, a bit of ribbon, my rippy ruler, my colouring pens, some pegs and a couple of dragonfly brads. I made the paper myself with the distress inks, and used a scrap bit of green paper to sit her on. Thanks xx
 What would I take on a desert island ? I would have to take a pack of cards, double sided tape, a pack of metallic paper, a colossal paper pack, a stamp, ink pad and of course my promarkers. The stamp I have used which is Popcorn the Bear could make so many combinations of cards with a variety of different coloured promarkers. The colossal paper packs you can get comes in all colours. Just picture the beautiful island, peace and quiet, sat colouring, heaven !! My card is made with just a square card, one sheet from the paper pack, a sheet of metallic paper and my stamped image coloured with promarkers. Hope you enjoy the challenge.
 I've used quite a few of my 'essential' items on this card, although my essential list is quite endless really - it would have been a very busy card if I'd used them all! My items include: digi stamps (I've used a Mo Manning one here... and I'm probably taking liberties with the theme - no idea where I'd get access to digi stamps on an island, but let's not worry about that!), promarkers to colour the image, coredinations card, lots of flowers, flat backed pearls, I'd need some lovely papers (this one is MME, one of my favourites), buttons, nestabilities (I've used circles and blossom dies here, and I suppose we'd have to include the big shot I cut them on)... oh and some sparkle - the paper is glittery and I used a sakura clear stardust pen on the little girl's headband.

My Desert Island card uses the items I love the most, pretty papers from MME and Papermania, rubber stamp image coloured with Promarkers and Twinkling H20's, Nellie Snellen dies, flowers and ribbon. Another must have is bling either in the form of glitter or gems.
 What would I take on a desert Island? Well I would have to say, lots of white card, - for stamping on, my copic pens and Watercolour pencils, Memento Inks, lots of ribbon and lace, charms, flowers, Spica pens, chalk and cotton wool, lots and lots of patterned and plain card & paper, My cuttlebug and Nestability dies, double sided tape, foam pads and glue and the big one would be magnolia stamps. My card is created using all my desert island bits. The images, all magnolia stamps from the spring club collection 2010, are coloured with copics and watercolour pencils. I used scalloped Nestability to cut the images and used chalk to distress the edges. I added some lace that has ribbon threaded though it (charity shop find), to pink pattern paper, oblong that I mounted onto my card base – Gate fold card. I add flowers and a thank you sign to the bottom corner and a bow and heart charm the top corner.
 Vix
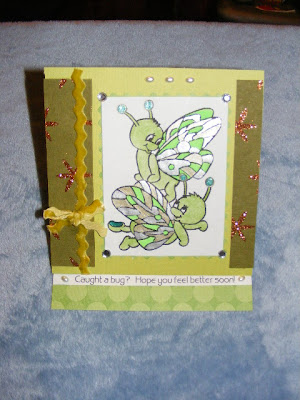
Vix I think for me it absolutely has to be starburst stains. I love the shimmer and the way they all come out unique when making backgrounds. I would also need flowers, I love prima flowers and paper roses. Also ribbon especially white satin as I can colour it with my promarkers which are an absolute must for me to take and I just love sticky gems and pearls, so much easier nowadays instead of fiddling with glue with the non sticky ones. Stamp wise most definately the butterfly beauties stamp plate with The Bling Maiden as there are so many possibilities I'd never get bored. Also embossing powder, I love moonglow midnight embossing powders which are black but change colour (I've used midnight teal here) I've also used a woodware leaf punch which is a firm favourite and cuts card easily. Brilliance ink is another must for me, it can be embossed, dries on most surfaces and has a lovely shimmer and finally stickles glitter glue as its high quality and dries 3d instead of the glue seeping into the paper and most of the sparkle disappearing.
******************************
She's got more Top placement blinkies than you can shake a stick at with a distinctive style that includes showing the fabulous insides that also match the outsides.

1. How long have you been involved in blogger and what led you to it?
I've been blogging since May 27th 2009, so almost a year. I started my blog as a way to share my cards with others who liked the same things. I'd been enjoying other peoples blogs and wanted to join in the fun! I'd been holding off as I thought it would be hard but finally couldn't wait any longer.
2. You're on a number of design teams and also run your own challenge blog, how did you get involved and any tips for people wanting to get involved in DTs?
I think my start into DT's was really a personal challenge for me. I'd been scrapbooking for 11 years and card making for only about 8 months when I applied for my first DT spot. All my family loved my cards and I got great comments on my blog but I wondered if it was only people "being nice". Being OK or nice for me is never enough, I always try to give my all into things I like and so really I think I was looking for validation that other people thought my work was good enough too. I also wanted to have a reason for creating cards just because I liked doing it and being on a team meant I could justify my creative time! LOL No longer was I "messing about with paper" I was "working on stuff for the team" :) At one point though I was on 8 teams and it was getting too much for me so unfortunately something had to give. The crunch came when I was offered two Senior positions within the teams and I wanted to devote a little more time to those and so I had to say goodbye to a couple of teams, but I still play on their challenges when I can.If you want to be on a team there are a few things I would recommend. Keep your "ear to the ground" and do some "blog stalking" looking for DT calls. When you apply read the application instructions carefully making sure you fill all the requirements and send the application in correctly. If it is a product team then look closely at the product and make sure it is something you can comfortably work with, don't apply for digital stamp team if you only like working with ink for example. Look at existing examples of the work they like from their website or blog, is it similar to your style? Can you fulfill the requirements of being on a team? It isn't just the creating of the card, you often have to comment on all or some of the entries on a challenge, you may have to make items to mail to the company or do tutorials. You also want to be able to promote the challenge/team whereever you can. You need to be a good, regular blogger who can keep to a schedule. Also be prepared to work with the team and not just complete a task when told to, having input into the team will make for a much better team for all members.If you are all these things not only do you stand a great chance of getting on a team but you will be a great team member and very appreciated by the team leader/blog owner.
3. Have you always made matching insides hense the name of your blog? What made you do that as its quite rare, even rarer to see the inside shown with every card!
I've also done the insides of the cards as they feel "naked" if there is nothing there. Plus it is nice for the recipient to have a beautiful inside to go with the outside. The reason for the inside photograph is simple, I sell my cards on eBay (or I did when the market was moving) and so I take the photo for there so I just got in the habit of adding it to the blog too.Really the blog name has nothing to do with that though, it comes from a couple of things.Firstly there is a Nick Jr poem on TV with Joe from Blues Clues (remember I have a 3 year old! LOL) talking about the earth. A line from it goes "use both sides or recycle with me". This stuck in my head as I've always told my children to "use both sides of the paper" when they are writing or drawing rather than start a new sheet all the time. Also I've been paper crafting for a long while and when I started there were only one sided patterned papers. When the industry started doing double sided I remember arguing with my friends about what a silly idea it was, "you can't see the other side so why have a pattern there too, it's just an excuse for them to charge more". Of course that was when I was a scrapbooker mainly and so one side would always be underneath out of sight. Now that I make cards I love that I can buy one sheet and make a card showing the two coordinating patterns, definitely using Both Sides of The Paper.
4. Your creations are of a very high quality, how long do you spend making them?
Thanks for those kind words, I really appreciate that.I'm actually blessed with speed when it comes to crafting my cards and most take less than an hour once I have the ideas in place. Really that's why I like playing in the challenges. I find a sketch I like, then look for a color combo or theme, then add a few challenges with products, jot them all down on a wipe off board and draw my card out before starting to put it together. I change things along the way in the creating, doing a punched border instead of ribbon, adding a flower instead of a button but really once I have my idea all together I can
5. Your top 3 tips!
1.Buy items you use all the time in bulk when they are on sale. Hobby Lobby and Joanns often have cardstock at 5 for $1 and I only buy then.
2.Organize your crafting space to fit the kind of crafter you are. I look for color first when I create and so my space has most things sorted by color making it perfect for me.
3.Keep up with the new trends but never forget the old ones that you love to do. I love my Copic's any started with them a year ago but I still try and paper piece at least a couple of times a month and I learned that technique almost 12 years ago.


 Number 18 making it SHEILA! Well Done Sheila, please email me to claim your prize :)
 Onto the winners of our Top 5 which was extremely hard for this one as you all did so well with your personal challenges but I got there in the end and have chosen....


 Our Top 5 as chosen by the Design Team are as follows...


