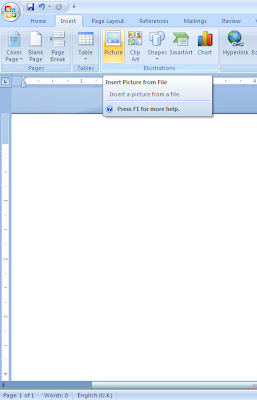
STEP 1 - Open up word and create a new blank document. Click on INSERT -> PICTURE as shown below then select INSERT PICTURE FROM FILE
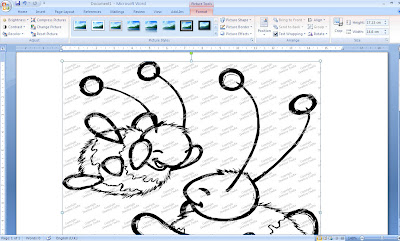
 STEP 2 - Locate your digital stamp on your PC and click OK. Your image will appear in your word document. It will usually be very large (as shown below) as digital stamps generally are for high quality.
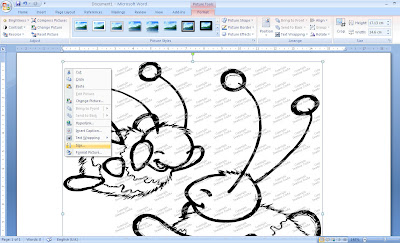
 STEP 3 - RIGHT CLICK your mouse and select SIZE. This will bring a pop up box up where you can edit your image to your requirements.
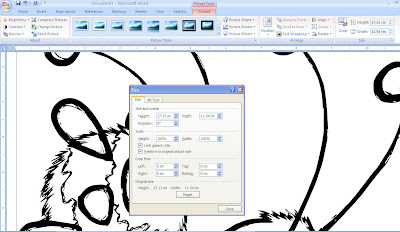
STEP 4 - Use the arows next to the height and width or type in what size you would like. You only need to do either the height OR width as it resizes for you automatically (Lock aspect ratio should be checked)
 STEP 5 - You're done! Simply print it out or add more images to the page so you dont use a whole sheet on one image.
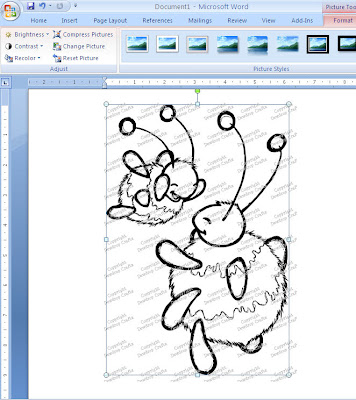
The beauty of these stamps is that you can make them small to fit ATC's or large to fit a scrapbook. Have fun!
Image used - Catch me Mummy Designed by Tasha Brown for Dewdrop Craftz


Thanks very much for this tutorial. I think I resize more by luck than skill so I'm off to try this out now.
ReplyDeleteKat x
Thank you, I'm the same, sometimes I 'get it' other times I don't. Not done it this way though, my laptop's a bit grumpy but it did do it this way too!(Lyn)
ReplyDeletethis is SUCH a help for a "new" but ancient computer silver surfer . Thank you . I am off to try it for myself
ReplyDeleteThank you so much - I have been struggling to figure this out and am so glad I found your site.
ReplyDeleteThank u so much.
ReplyDelete