We are grateful for our lovely followers

Follow on Bloglovin

Google Website Translator Gadget

Monday 30 May 2011

Challenge 47 - Love the lasting kind

Good Afternoon, sorry I'm a bit late!  Thank You for your entries to our embossing challenge, you sure do love that technique either wet or dry!  Winners will be announced n a couple of weeks, sorry if you haven't had a visit yet as several members of the team are still struggling to log into blogger!

Our challenge for you today has been set by Benita and she has chosen the theme "Love the lasting kind"  She would like to see you create something for someone/something you love and why.  There's a lot of teens leaving school and uni this month so a great time to show you care!


We are sponsored for this challenge by The Stampman who are offering a £10 voucher to use in their store, it has a huge amount of crafty items from ribbons to papers to paints and messy things!  Please do pop over as its an aladdins cave for the crafter at great prices!

Over to the girls and what they've created for this challenge!


This week Benita has set us a challenge to make a card to show someone we love and why well I decided to do one of my daughter Amy and the sentiment is just because the reason being with all my problems lately she has made me realise that I am worthwhile and loved dearly so this is why I did this card

                                                                              Caz


Thanks Benita for the lovely challenge of Love, who and why. I chose my grandchildren, well 5 of them,  the 6th was having an afternoon nap.  “My Family Make My Heart Sing”.
The background paper is from Tim Holtz Vintage Shabby Paper Stash.  I stamped two of the words, added Scrabble tiles and used die cut letters.  The heart is a stamp from Papermania, to which I added some glitter.  This is the first time I have used a photo to make a card, I am pleased with the final outcome.

This was a wee challenge for me, only trying to decide who I should be making a wee card for! In the end I picked my Brother! I miss him so much especially just now, with him doing "secret stuff" with the Navy and Special Forces! So I decided to make a wee card using the picture of us before he gave me away! The papers are from my new First Edition Stack, Martha Stewart Butterfly punch and a wee Sibling Quote I found online.

Josephine


And under the flap ...

This was a hard challenge for me, partly because I don't do 'overly sentimental' things. And anyone who knows me well would be worried if I suddenly did a card like that! I also don't put photographs of my family onto public sites like blogger. (Or even use names, so it's has been brushed out of the photos.) Instead, I went for a bit of  humour. My daughter is our youngest, and she's in the midst of AS levels at the moment. She's clever, but she's found it difficult this year, and she's been working hard. So, I wanted to do something to mark the end of the exams, while reminding her that she's only half way there! I think she'll find it funny - she's definitely got a good sense of humour, and she's someone who loves to mark occasions with a card or other creation. 

The two digi stamps are coloured with Promarkers, and the piles of books are permission free images that I've added titles to in Photoshop Elements!

Unlike Josephine above me, I am a sentimental old softy. I made this for my Daughter to show her how I see her, which is with beauty radiating from within, as the sentiment says. She has been my rock, my joy and my laughter, since the day she was born when I looked into her little pinched up face and my heart was lost forever. Of course there were moments as she grew that were frustrating, but on the whole she has been a person to be proud of. One whom friends can call on and know she will be there, one who sticks up for what is right no matter what the cost to herself and one who has shown me more love than I could ever wish for. She has filled my heart with love and my life with delight and wonderment and has become my absolute best friend. Sweetheart I love you.


Monday 23 May 2011

WINNERS!

We have the winners of challenge 43 and 44 plus a redraw for challenge 41.  Please remember to claim your prize!  If for any reason you'd prefer to pass on a prize please also let us know so we can redraw it.


(REDRAWN) CHALLENGE 41 FABRIC HOSTED BY LIN

Winner of a £10 voucher to ONE STOP CARD AND CRAFTS IS....64. Anita M

CHALLENGE 43 - A RECIPE
Winner of a £10 voucher for THE STAMPMAN is...32. Iulia


CHALLENGE 44 - A ROYAL WEDDING
Winner of a £10 voucher for JOANNA SHEEN is...54. Tracy


Our Top 5 choices are below.

TOP 5 for Dionne's Recipe are...


Top 5 for Vix's Royal Wedding are...


Well Done all and thank you all so much for your entries!  Please grab your blinkies above, if you're a prize winner please email me your details.

Monday 16 May 2011

Challenge #46 Embossing

Good Afternoon and welcome to our humble abode!  Todays challenge has been set by Teamie Tracy so before I hand over to her just a quick Thank You for taking the plunge with our Steampunk or Machines challenge!  There are some fab new images around for this rising trend which are lovely to see :)  We shall be back with our winners catch up soon so do check back.  I shall now hand you over to Tracy, its her first time hostng so be gentle!


***************************
As a new(ish) DT member I'm very excited to host my first challenge, this time I would like to see EMBOSSING on your project. It can be heat embossing with your inks and embossing powders or dry embossing either by hand or using a machine so there is lots of scope for this challenge.


We have a lovely prize from Joanna Sheen for this challenge - a £10 voucher to spend in her online shop which is packed full of goodies!


Here's what we have come up with to inspire you, please do leave us a comment as we love to read them!
I used the Glitter Girls Dress to Impress embossing board to emboss this little handbag. All you have to do is emboss the shape, cut it out and fold the score lines. I embossed some extra details on the same board to add the catches using some mirri board. The flowers and leaves are also embossed this time using a Crafters Companion board, some glue and a few sparkly stones for the middle and job done.
  

For this challenge, I have machine embossed the background, its a Tim Holtz texture plate that Ive fed through my cuttlebug and then just cut round the design, as you can see.

My printer is now running out of ink and has made lines on my image but the image is so stunning that for me, I can still get away using it......the only either items Ive used is a printed acetate die cut by K&Co and the wording has been chopped out of another printed die cut item by K&Co.


i have used my embossing folders with the vagabond machine for this card. various folders used the backing paper is just smooth white card embossed with as sweet as can be on the top and basket weave pattern on the bottom chalked over the birds,words and flowers to help them stand out more. the embellishments are cut and embossed from whitewash coredinations cardstock.then just some ribbon added to finish off


I have 2 for this one is a cheat emboss which is this one I wanted to show that even if you don't have an embossing maching with some of the gorgeous papers about today you can still get a great embossed effect for this I have used Sharon Duncan embossability papers

Now this is the card I did emboss the main BP is from MCS tattered lace cd rom then the silver strips are actually some tape we got to use on the car as we had a leak in the cooler tank didn't work so ended up having it and it embosses beautifully I used an embossing folder can't remember the name of it then I embossed the purple sheet with a different folder the image was cut amd embossed with a nestie and the the roses and bow I made myself dead easy.
I've used heat embossing for this card. The background was stamped with a swirl stamp in gold ink, and then embossed with holographic clear powder. I edged the card with more of the gold ink. The dragonfly was plain chipboard, and I used multiple layers of blue ultra thick powder, followed by a top layer of gold. While it was melted, I stamped it with a background stamp from the V and A collection. I finished the dragonfly with some Promarker coloured sticky gems.

I decided to make a deep embossed pendant. I started with a 2" sq piece of mountboard, which I coloured with a black marker pen. Then added 3 layers of clear UTEE (Ultra Thick Embossing Enemal), whilst the last layer was still very hot and molten, I stamped it with a stamp I had previously prepared with Versamark clear ink on it.


After the piece of card had cooled, I removed the stamp, at this stage if your not happy you can melt the UTEE again, and start to stamp again. Once cool, I stamped with Versamark again and brushed on two mica colour powders. Brush it clear, then pat onto a wet wipe to provide the moisture for the mica powders to be set. Add a jewel finding and a chain. Apart from the gold chain, a very cheap, yet attractive piece of jewellery.


I decided on dry embossing for this challenge using my bigshot and embossing folders. I used a very cute Wee image that I coloured with Promarkers, Derwent pencils and Sansador. The paper is a freebie from a magazine and I chose pearl card to emboss as I love the effect it gives. I used a Magnolia Doohickey border die to edge the blue card before I embossed it. I then added a few flowers, made with an xcut punch and embossed. A craftwork card sentiment, some  ribbon, charm and pearls to finish.

For the embossing part of my card I have used a cuttlebug embossing folder on purple pearl card and also Cor'dinations Whitewash card and then sanded it to reveal the purple underneath. My image is a stamp from LOTV coloured with ProMarkers.The roses are from Wild Orchid Crafts.The backing paper covering the card base is actually music notes from "the wedding march" but it's totally wasted because you can't see it lol


 For this wee Challenge I wanted the Embossing to be the main focal point so I stuck with white and a touch of colour! I used my embossing folders for the panels and some hand embossing on the background! The image is coloured with promarkers and some embossed flowers, card candy and a sentiment to finish.

For this challenge I've gone for a double-whammy! LOL.  Firstly I heat-embossed my image (CI-210) with Black deail embossing powder.  I coloured it with some lovely Starburst Stains  Then I added a little bit of Cuttlebug Embossing (D'vine Swirls folder) behind the image. 

I love embossing, well heat embossing anyhow !!! I have stamped the cat and the writing and then embossed them both, then I inked the ATC and this caused the resist technique against the writing and the Cat. I also sprinkled on embossing powder randomly and then heated it all, gives a kind of smokey feel. Enjoy this challenge crafters. xx

 Vix


I love embossing particularly heat embossing so thought I'd have a play with this really old jigsaw piece I've had forever in my stash!  I triple embossed with moonglow two tone embossing powders then placed the hero arts fabulous flourish stamp in the melted powder, added some ribbon and beads and some punched butterflies painted with ferro texture paint. Not sure if the card base is too plain but I had fun just playing anyhow :)

Eiglas

...shock horror..! Eiglas has done a pretty card....! LOL! Look closely and remember, it may not happen again for a while!  Embossing you wanted, embossing you got - all three kinds although I did kinda cheat with the wet embossing and used a glaze pen! LOL!
I made an altogether different project then decided not to use it so it was 4.00 am when I finished this one! 


Monday 2 May 2011

Challenge #45 Steampunk or Machines

Good Afternoon and welcome back to another challenge at Crafty Cardmakers!  We've had a makeover as you can see to give us a fresh new look and we also gave the Spotlight Challenge a makeover too, pop over and see what's going on there too!

Firstly Thank you for your dazzling array of entries to our Royal Wedding challenge, lots of red, white and blue going on there!  Did you all watch on Friday, wasn't she stunning!  I've also learnt what a fascinator is and am still laughing about Princess Beatrice's lol!

We're also changing when we post winners so winners of Royal Wedding will be posted weekend of 14th/15th May.

Don't forget to check the rules as we have changed them recently, they are in the tab above!


CHALLENGE 45 - STEAMPUNK or MACHINES

Ei has chosen the theme for this fortnights challenge and she would like to see Steampunk or Machines!  Before you all run away screaming have a think about this one and perhaps step outside the box ;)  There are lots of free resources available to print out and have a go and just to help you along if you're unsure what Steampunk is simply think Steam = Old/Victorian and Punk = New/Modern or you can opt for the Machines instead.


We are sponsored today by ONE STOP CARD CRAFTS who are offering a £10 voucher for their store as a prize.

At One Stop Card Crafts we have a big range of ever changing discount making and card making craft supplies.
We are always adding to our range of craft supplies which are ideal for making handmade greeting cards, do-it-yourself invitations scrapbook pages, altered items and much more.

Our card making craft supplies include free UK postage, our popular discount scheme and quick service means our customers keep coming back for more.
Our prices are very competitive and this & makes us an ideal place to buy your card making supplies online. Some of our new products include Petaloo flower layers, Ranger Glitter Glue and Martha Stewart Punches.  We also host a regular challenge at http://onestopcraftchallenge.blogspot.com/


Over to the team!


It's my week to choose the theme and I've chosen the twin themes of 'Steampunk' and 'Machines' which to begin with, slightly scared some of my teamies! LOL!
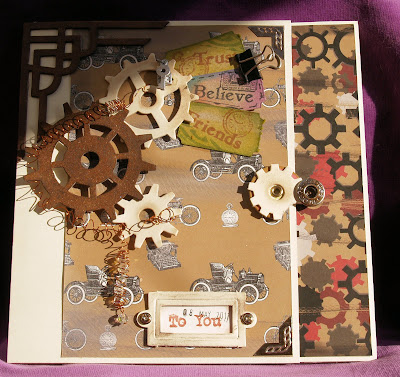
For my project I've made a birthday card for my Hubby Nic in a Steampunk style and with added machines!
Full destructions on my blog!


My project uses a bicycle topper from Flower Soft, I mounted it onto holographic card, added a deep border of Flower Soft, used some angel hair I've had forever. I used some more of my bargain flowers with some pearl brads and flattened bead caps for the centre. I tried to do steampunk and struggled with it so went for the alternative.


Ok so this is my first attempt at Steampunk and I really enjoyed it :) It's totally not my normal style which is cutesy so it was quite challenging. The girl is a digi stamp called "Steampunk Lady Audrey" from an Etsy shop called The Octopode Factory. The paper and tag are from a digi scrapbooking kit (can't remember where its from sorry) I have watercoloured the image. Now the cogs.....they took a long time to make lol I used peel off sticker cogs and traced them onto some shrink plastic,cut them out,shrunk them down, then I put some clear embossing ink on them and then heat embossed them with either bronze or silver embossing.I punched the butterfly and also embossed it with bronze powder and added glitter for its body and trail.Finally added some screw brads, ribbon and heart and key charms all from my stash.


this is my first attempt at steampunk and I must say I loved getting messy making my own papers and embellishments the cap with the pic in and the nuts and screws are painted with enamel paint and the lace and dressmakers dummy was coloured with a tea bag


here is my attempt at steam punk used a mix of papers some tim holtz and the main image is from graphic 45 used tim holtz crackle paint on background and glittery embossing pwd under the main image. the die cuts cogs and heart with wings and crown all tim hotlz die cuts by sizzix i put some cogs and clock pieces in her hair with some paper flowers. can't say i am over enthralled with my creation but for a newbie at steam punk i guess it's ok


Oh boy did I love doing this challenge!!! First I made a lovely Steampunky box using lots of paints, sprays, tissue, stamps and of course Tim Holtz Dies with a little rose from Primark on the top. Then I went to town and made my necklace to go with it. I shall put lots of pics of these on my blog so you can see the details.


This was a real challenge for me! Not only did I not know what Steampunk was I had no idea what to do! So after a few hours browsing the net I came across some fantastic ideas!

I took a bit of MDF Hubby had lying around and just went wild! I used papers, Tim Holtz distress inks and embossing powders and gloss! Dug out my jewellery making stuff and strung beads and bits together, stuck down everything and coloured a wee image I found called Steampunk Lady Audrey with promarkers. Then I added some faux stitching to finish it off.


Well,this is my Steampunk styled card, Ive used a red base paper from the DCWV Mariposa Collection and then all the other elements/images are from the Graphic 45 Steampunk Debutante Collection.


Heres my steampunk Monkey !!! I just loved doing this, really really enjoyed it, okies, My image came from google images, there are loads out there, so no excuses, I used promarkers to colour and then added some chain and some letters, then some misc bits from my tin of odds and sods, then alcoholed some corners. More piccies on my blog xx


I was a little intrigued what I could do for this challenge and then I found a digi artist called Teri who sells her images under the name Delicious Doodles.  I just love her stuff!  Some of it is a bit 'darker' than other digis and she does some fab steampunk designs.  The image is trimmed and placed onto a piece of embossed and sanded coredinations paper and the black and white paper behind is from stash.  I created the background myself with some scraps of black lacy material and simply stretched it over card.  The finishing touch being some cogs made from a template and coated in metallic perfect pearls.


I was also a bit worried by this one and intrigued and was thinking of doing a victorian lady on a rocket but then found I'd given my victorian lady stamp away in my last clearout lol!  Judie pointed me to some freebie links on her forum which then led me to a favourite hangout - DeviantArt so I searched for "Steampunk Lineart" and found this stunner by SUREYA.  You'll find her Steampunk girl here.  She is of course a mix of the very Victorian dress and gun mixed with the very modern chibi, love it!  I've coloured with promarkers and derwent coloursofts using papers from Bearly Mine who have a great cogs one in the Boys Zone collection.


Have fun with this one, we were a bit nervous too but glad we took the plunge!